


How to make a Hula Hoop
Hoop Making Tutorial
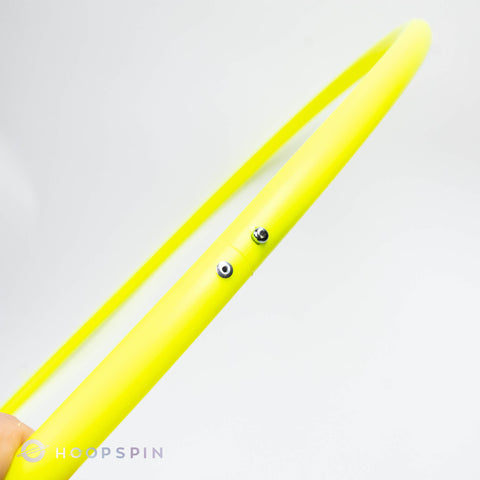
We love selling beautiful coloured polypro hoop tubing in the UK and Europe but what do you do when you get it??.
We’ve been making and selling polypro hoops in Europe and the UK since 2007. There’s a lot of great info out there on how to make polypro hula hoops. I learned from Isopop.com but most of it is with materials and measurements from the States.
Here’s what we use for HoopSpin hoops in the UK and how we do it. Scroll down for troubleshooting. The materials list contains some affiliate links but it is to the actual tools I use!
For those who hate to DIY don't worry you can buy hoops HERE
Making a Hula Hoop
Materials:

- Beautiful Coloured Polypro: (Or normal clear. NB. Clear tubing will need stretched/relaxed first because it is coiled too tightly. I wrap mine around a square box overnight. Coloured tubing comes in large coils and doesn’t need stretched. YAY)
- Insert tubing: We use 16mm regular (5/8”) for 20mm (3/4”) hoop. 12.7mm Small (1/2”) for 16mm (5/8”) tubing) Polycarbonate
- 120 inch fabric measuring tape – This is link for 3 tape measures they need replacing every so often and get lost easily!
- Cordless drill – Bosch Cordless Combi Drill Universal Impact 18 Great lightweight drill comes with 2 batteries so you can have one on charge.
- Drill bits: 3.5 mm and 6.5mm -7mm (adjust according to rivet and push button size)
- Router Bits 5/8" for 20mm ¾ for 25mm. Full set of bits. The one thing I wouldn’t be without to be honest.
- Tube Cutters (not essential but really helpful): TOLESA Pipe Cutter Tools
- Main Pipe Cutters - TIMCO Pipe Shears
- Pop Rivet gun Stanley Fixed head rivet gun
- Rivets 3.2 x 10mm
- Push Button : I use Regular buttons they fit both 20mm and 25mm hoops
- Stanley Knife/Sandpaper -
- Silicone Plumbers lubricant (not essential you can use vaseline)
- Pen (Sharpie)
- Calculator
- Gaffer Tape, Patterned Duct Tape, Shiny Holographic tape
Get everything ready and have it to hand or you’ll spend 20 mins looking for your drill bit/stanley knife!
Method:
(Scroll to the bottom for our quick reference guide and trouble shooting)

Work out how much tubing you need. You need to know the circumference (distance round the outside) of the hoop. Circumference = diameter x Pi (3.142) e.g 36inch hoop: Circumference = 36 x 3.142= 113.112. Take your tape measure and measure around the outside of the tubing. Mark it with a pen. Measure twice cut once. Advice for life people.

If your just making hoops for yourself, you can skip this step. If your selling hoops I wouldn’t. It makes the connection super clean. Take your tubing cutters and make a groove around the tubing where the pencil mark is.

Remove the tube cutters and grab your pipe cutters. Place the blade in the groove and make one smooth cut moving the cutter downwards in a circular direction along the groove. If you didn’t use the tube cutters place the pipe cutters on the pencil mark making a right angle with the tubing and make one smooth cut.

Get your insert tubing line it up with the curve of the hoop and push one end into the cut tubing. If it’s a bit difficult use some silicone to make it easier. If it's too tight router bits are the best thing ever for hoop making. Attach it to your drill and shave a little bit from the inside of the tubing.

Connect the other side of the hoop to make a circle. Now is the time to check for gaps. If the connection isn’t flush try sandpapering it down so it’s not wonky or try shaving little pieces off with a stanley knife to make it clean.

Take your drill with the 3mm drill bit and drill two holes in the tubing making sure you don't drill too far out from the join or you can miss the connector. Before you drill lay your hoop on the floor and check it isn’t twisted.

Put rivet into rivet gun. Put the rivet into one of the holes in the hoop and keeping a little pressure on the hoop squeeze the handle of the rivet gun until the rivet breaks away. Not sure how to do it? Check here

Now you can decide. If you want a non collapsible hoop you can just pop another rivet in the other side of your connector. If you want a collapsible hoop switch out your drill bit for a 8mm bit if using a big button or a 5mm bit if using a small button and use your drill to make the hole on the other side slightly bigger. Take your push button/spring clip and slide it into the connector tubing until the button pops up through the hole. Push down the button and slide the two ends of the hoop together. We make our hoops with the button leg facing out like in the photo. This is so it doesn't push the rivet out and if you push it too far inside the hoop when opening it it doesn't get stuck.
TADAHHHHHHHH!!! You did it! You can now run a strip of gaffer round the inside, run some sandpaper around the inside or get some colour changing see through tape and make it super shiny. We get our tapes at Fancy Tapes. You should now brush up the little curly bits of plastic that you drilled out. Otherwise they stick to your socks and get up your leggings and all round the house. Hoopmakers equivalent of glitter. ENJOY.
Quick Guide to Hoop Making:
- Calculate Circumference
- Measure tubing around the outside
- Use tube cutters to make groove
- Use pipe cutters to cut tubing
- Insert connector and join the hoop together. Check for gaps.
- Drill 3mm holes in both sides of tubing
- Pop rivet one side
- Drill 4mm hole on other side
- Insert push button into connector
- Close Hoop: GO PRACTICE
Trouble Shooting your Hoop Making:
Theres a gap at the connector:
Dude! Step 5. If you got too excited and drilled and riveted and everything but now there is a gap. It’s ok. You can either put a little bit of tape over it, ignore and carry on hooping or drill out the rivet and sandpaper it down/shave bits off with a Stanley knife
The rivet is a bit sharp:
This happens sometimes when the rivet doesn’t break off right. I find turning the rivet gun on it’s side and smacking the top of the rivet a few times sorts this out. Don’t be gentle, now is not the time.
It’s not quite the right size:
Ok! Hopefully it’s too big because even if you water it really well, it’s not going to grow again. If you’re trying to make twins and they don’t quite match you need to cut one down a little. Put your rivet (small) drill bit in the drill, place it in the little hole in the rivet and drill down applying a little pressure. Be careful! This will drill out the rivet then you can remeasure the hops around the outside and cut a bit off to make sure they are the same size then redrill and rivet again. If they still don’t look quite right sometimes it’s just that there is a slight variation in the tubing. Try leaving them lying flat for a while.
My tubing cracked when I cut it:
This happens sometimes if you aren’t paying attention (because you are watching season 3 of Sons of Anarchy while making hoops) and the blade isn’t lined up especially when it’s cold. You have to go back to step 3 and 4 and cut off the cracked bit. Don’t worry you have to cut off 3.142 inches off circumference before you make an inch of difference to the diameter!
My hoop isn’t quite round:
Sometimes if you don’t line up the tubing insert and have a quick check you can have a little twist in the hoop which means it doesn’t lie flat. You can still use it. Or you can drill out the rivet and redo it. If it bows at the connector or has a flat bit it’s normally an insert problem. You need a different insert. Take out the old one. I find an curved insert at 3 -4 inches is the best. If you are using polycarbonate connectors they are shorter because they are straight so they need to be smaller so they don’t flatten out the tubing. If it dips in (like a heart shape) at the connector it’s normally because you didn’t stretch the tubing (CLEAR ONLY) enough before you tried to make hoops. Coloured tubing is prestretched so shouldn’t ever have this problem.
These are the issues that have come up for us!
Thanks for reading. Enjoy your hoop making!